So you've got your Continua CI server set up to automatically build, run unit tests and produce reports for your awesome new web application. Now you're ready to try out your project in its natural environment and then eventually release it to the wild for well-deserved public applause.
Up until now, your options were either to use a Copy action to push the files up to test server and a PowerShell action to set up web services, or preferably run a FinalBuilder script utilising the plethora of actions available for transferring files and interacting with web servers.
As of version 1.5, Continua CI can also work together with Octopus Deploy server to provide an end-to-end continuous delivery mechanism. Using the new build event handlers feature, Continua CI builds can now be set up to create Octopus Deploy releases and initiate deployment to test and production environments, at key points in the build process.
This post will walk through the steps required to push a .Net web application built in Continua to Octopus Deploy and trigger a deployment process to effortlessly get your application running on your test and production servers.
Preparing your solution
Octopus Deploy requires that you provide your applications as NuGet packages. You can create and push the package to the Octopus Deploy server using Nuget Pack and Push actions, or create and push an OctoPack from MSBuild or VisualStudio build runner actions.
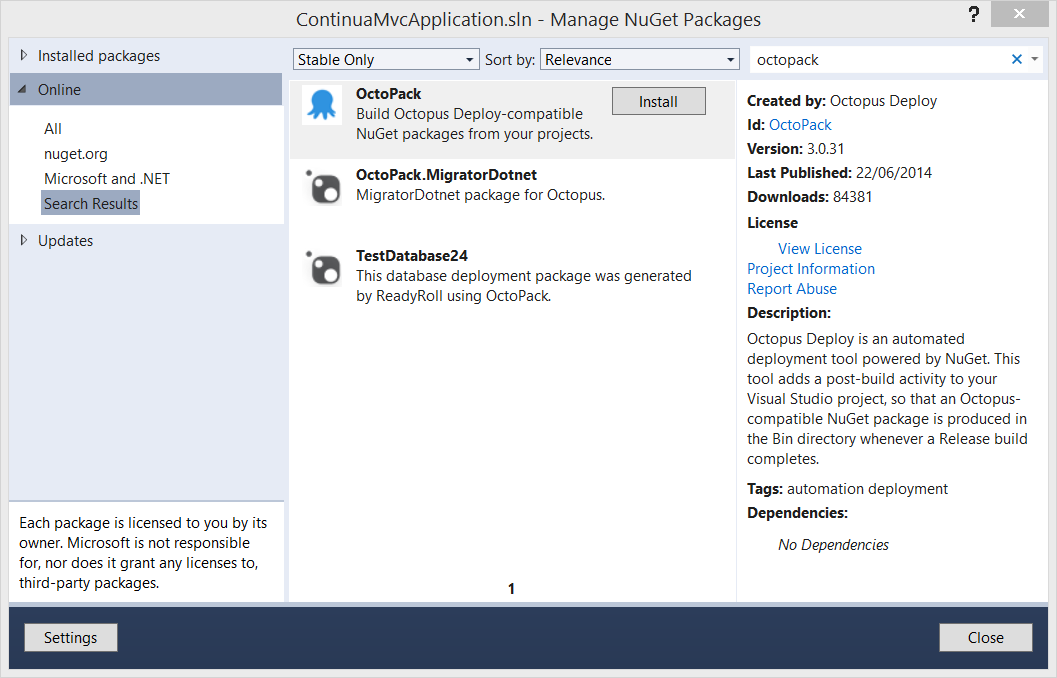
Lets go with the recommended OctoPack option. First prepare your Visual Studio solution - use the NuGet package manager to install the OctoPack package into the projects you want to deploy. This will include web application projects, console application projects and Windows service projects but not class libraries and unit test projects.
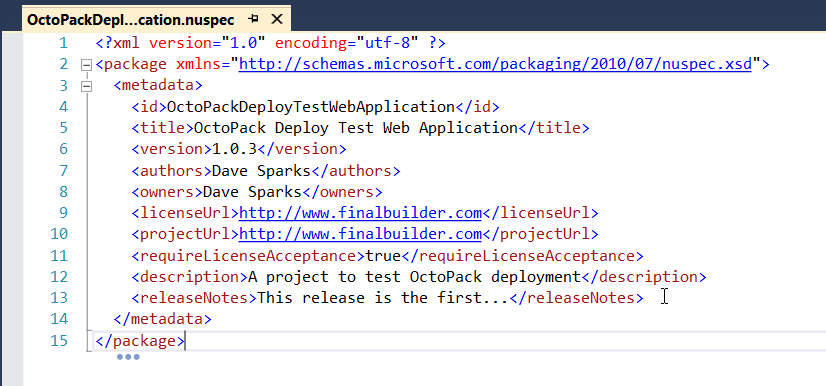
You can now optionally add a .nuspec file to the root folder of your project to describe the contents of your package. If you don't provide a .nuspec file, OctoPack will automatically create one based on your project settings.
Setting up the deployment process
Next head over to your Octopus server and set up a deployment project. This should include a “Deploy a NuGet package” process step as below.
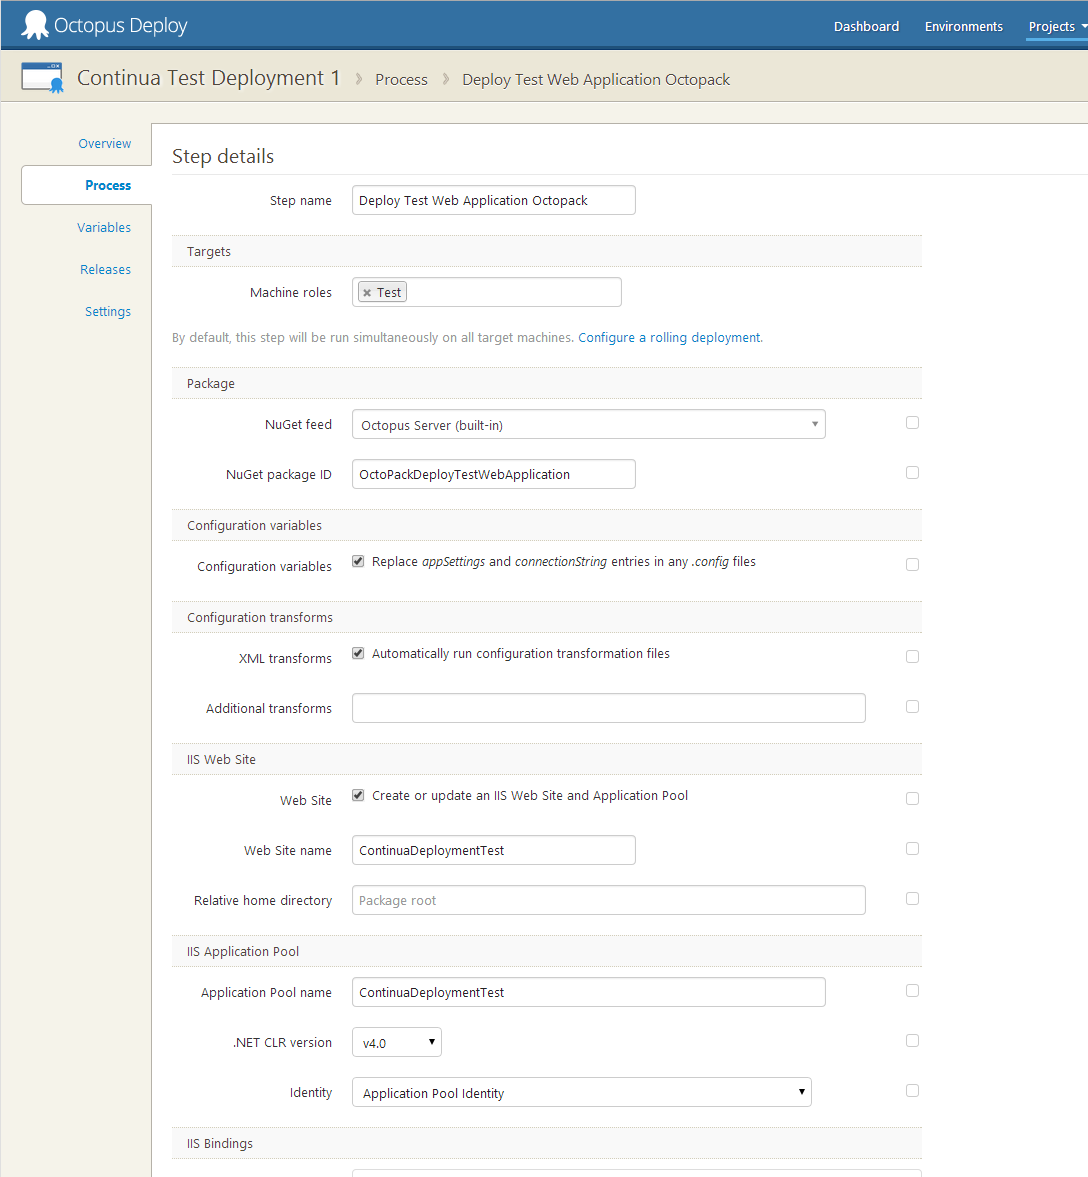
We will set this to retrieve the application package from the built-in NuGet feed. Note that the NuGet package id should match the id element in your .nuspec file - this will default to the name of your assembly.
We added a few more steps:
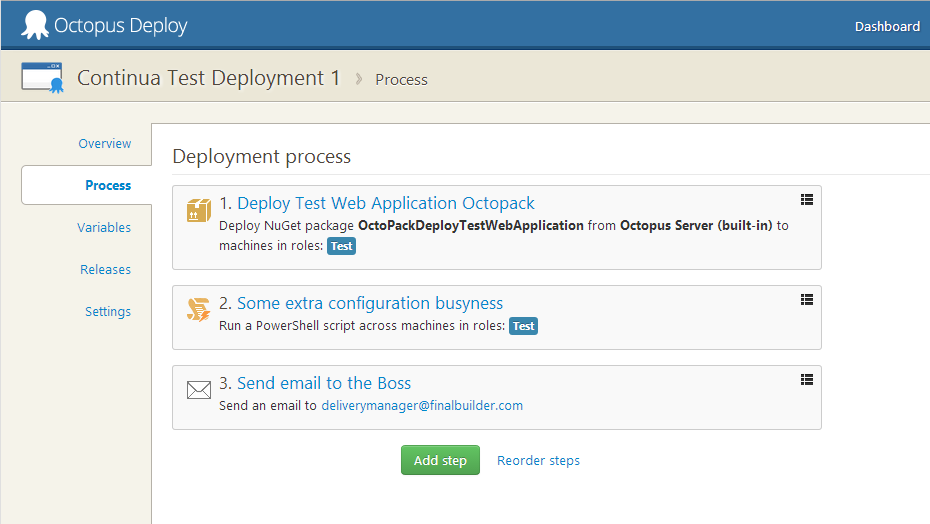
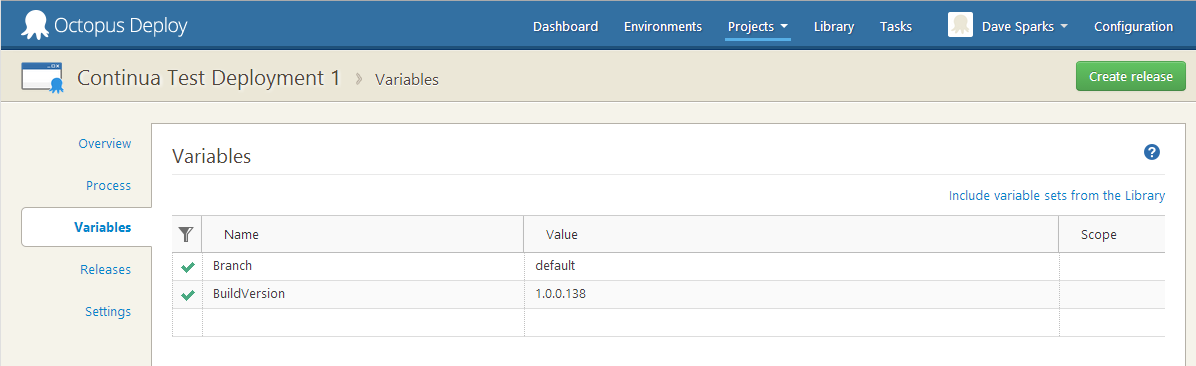
And some variables:
Setting up the build process
You can now get back to Continua and set up a configuration for building your project. Once you have entered the configuration details and linked up the repository containing your project, move on over to the Stages page:
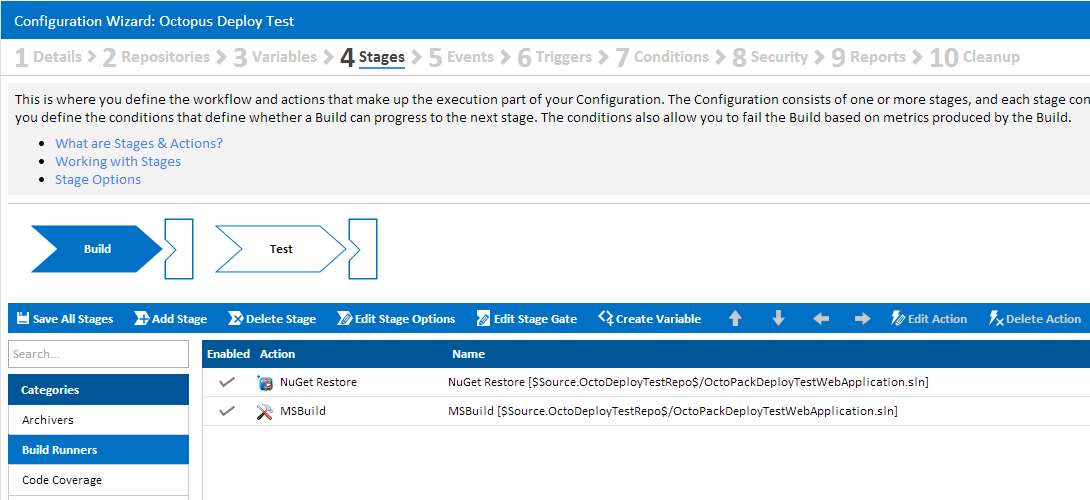
For this simple example you'll need two actions: a NuGet Restore action to ensure that the OctoPack package is available for the build and an MSBuild action to build and push the application to your Octopus Deploy server.
Just enter the path to your solution for the NuGet Restore action (the other fields can be left as is) and complete the main tab of the MSBuild action as required for your project.
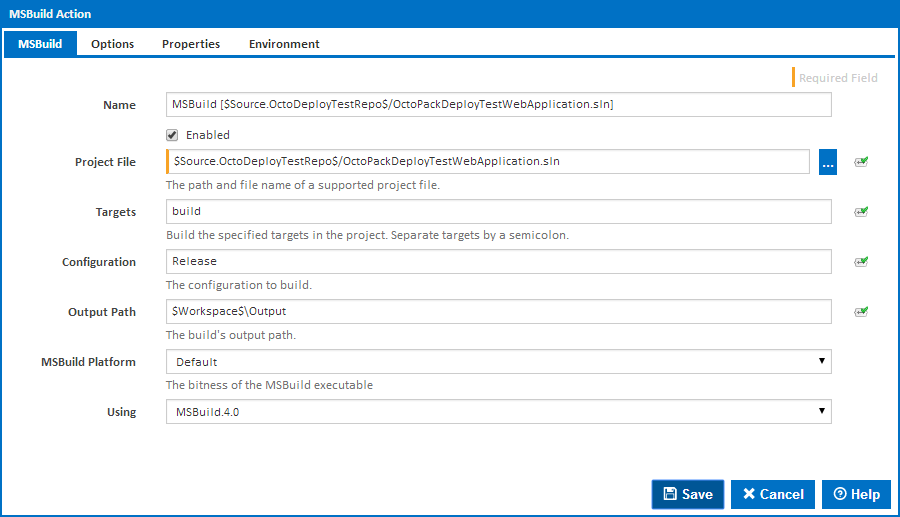
You then need to enter some additional properties to tell MSBuild to run OctoPack and tell it where to send your package.
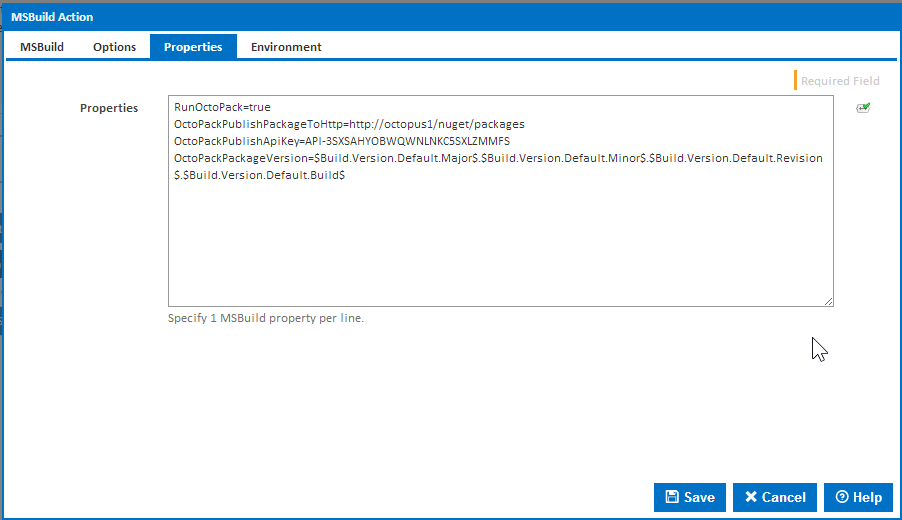
Set the RunOctoPack property to true and the OctoPackPublishPackageToHttp property to the URL for the NuGet feed on the Octopus Deploy server e.g. https://octopusserver/nuget/packages
You will also need to provide an OctoPackPublishAPIKey property – you can generate an API key on your profile page on the Octopus Deploy server.
Optionally, you can use the OctoPackPackageVersion to specify up the package version. Here we use Continua expressions to set this based on the build version. If you leave this out then OctoPack will get this value from the AssemblyVersion property in your AssemblyInfo.cs file.
Once the actions are set up and saved, run a build and check that your package gets uploaded to the Octopus Deploy server. Then create a release for your deployment project and test that it deploys ok. Now we are ready to look into how to run this process automatically from Continua CI.
Build event handler
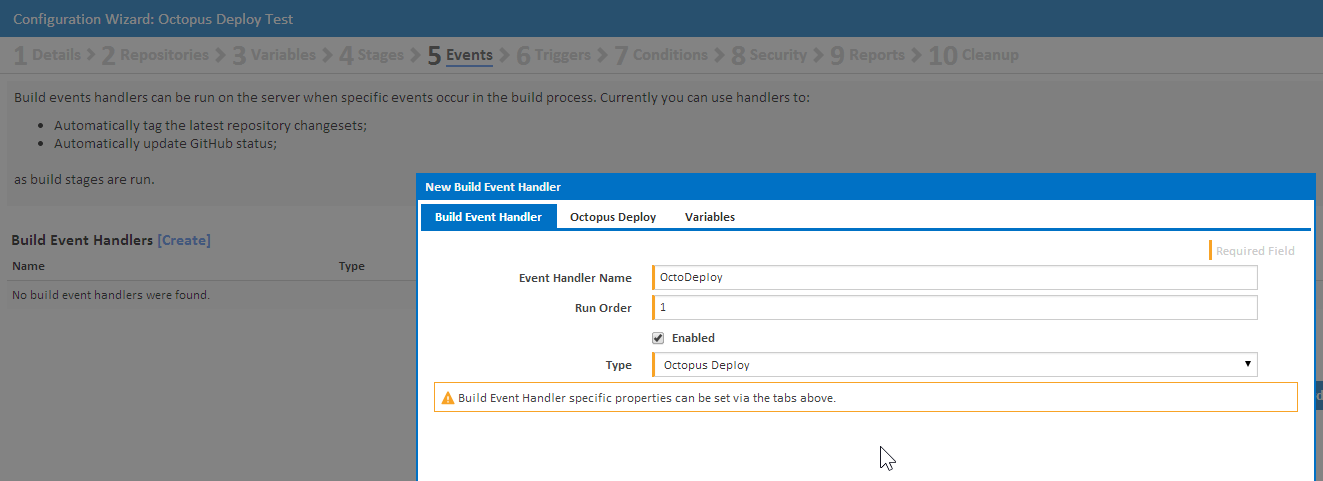
On the Continua CI configuration wizard after Stages, we have a new area titled Events. Here you can add Build Event Handlers for tagging repository changesets, updating the GitHub status and interacting with Octopus Deploy.
Create a new build event handler, give it a name and select the Octopus Deploy as the Type.
You can now provide general project details under the Octopus Deploy tab.
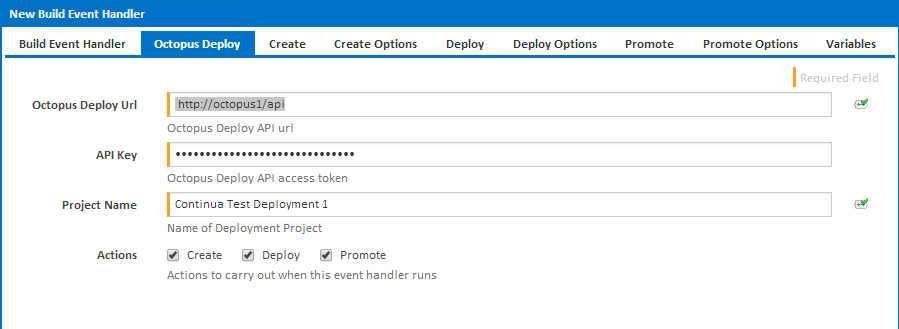
The Octopus Deploy URL should end with '/api' e.g. https://octopusserver/api. Enter the API key generated under your Octopus Deploy profile and the name of your deployment project.
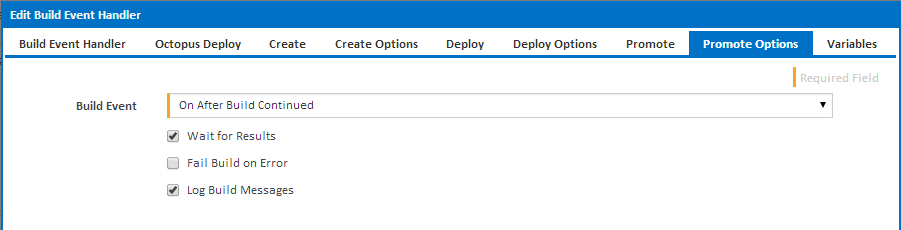
You can then choose one or more actions to run. The available options are Create, Deploy and Promote and are used to create a new deployment release, deploy a release to an environment and promote a release from one environment to another. As you select each action, new tabs open so you can provide further details and hook the action to a build event.
Creating a release
Before you can deploy an application you need to create a Octopus Deploy release
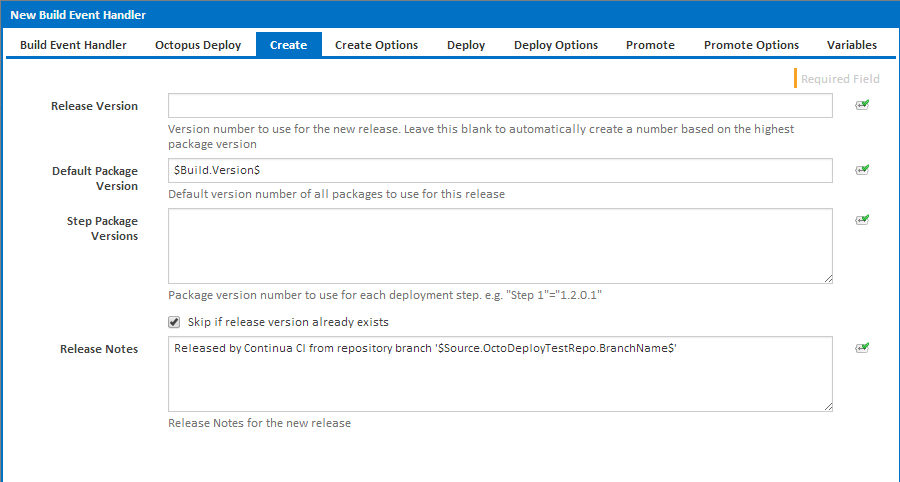
When creating a release you can specify the Release Version or leave this blank to automatically create a number based on the highest package version. You must provide either a Default Package Version or Step Package Versions for each step which requires one e.g.

Flip over to the Create Options tab to tell Continua when to create the release.
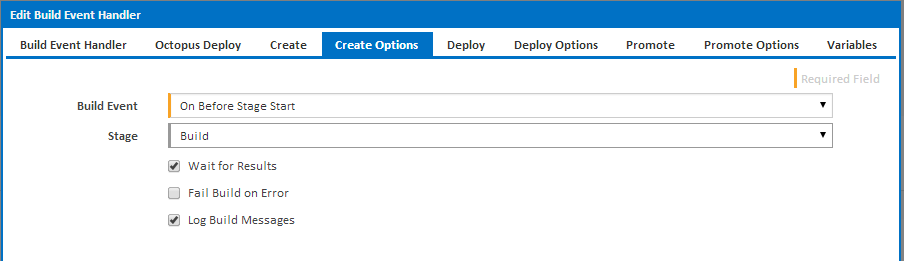
There are six Build Events available to choose from. Some allow you to select a Stage and some allow you to select a successful or failed Build Status
- On Before Stage Start
- On Sending Stage To Agent
- On Stage Completed
- On Build Pending Promotion
- On After Build Continued
- On Build Completed
Generally we want to create the release at the start of the build before the first stage starts.
Deploying to an environment
Now on to the crux of this whole process - deploying your application. We generally deploy to a Test environment first and then, once we are happy with the outcome, promote to a User Acceptance environment or directly to Production. Continua CI allows you to deploy a release previously created by a Create action in the same build event handler, the highest release version in the project or a specific release version. It's up to you to ensure that the release version exists before the deploy action is run. An environment can consist of multiple machines - you can specify which machines you want to deploy to. If no machines are specified then the release will be deployed to all machines in the environment.
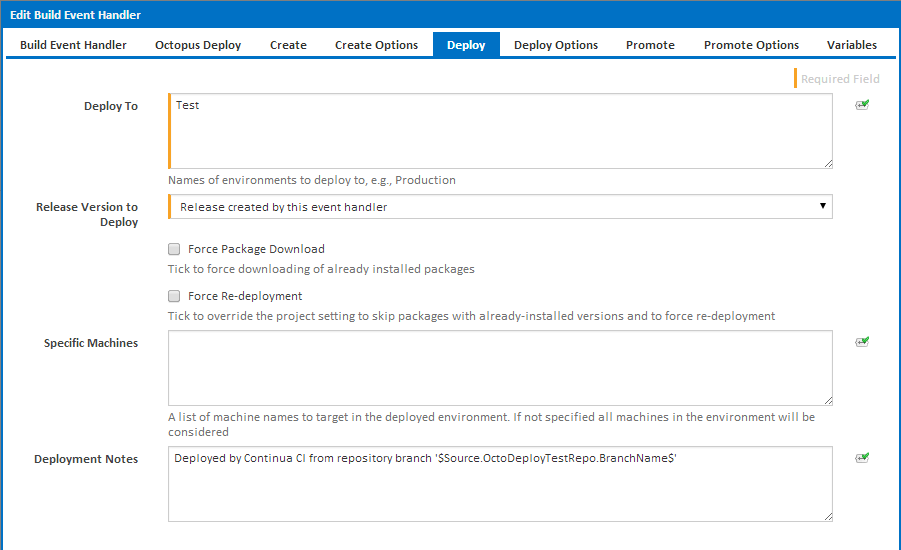
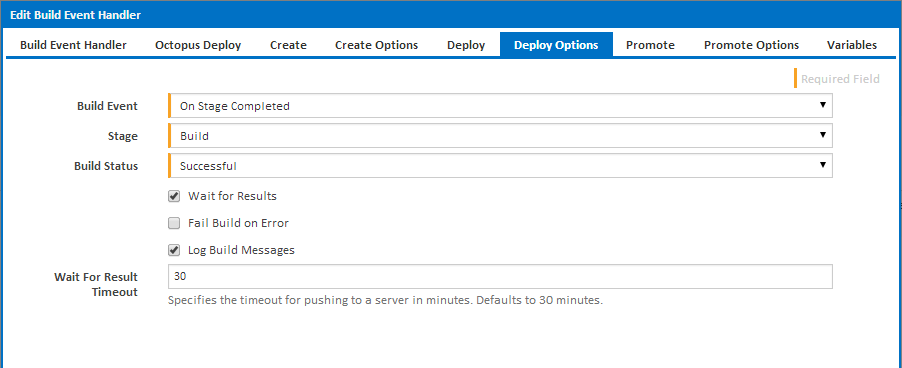
When selecting the Build Event for deployment, ensure that it is triggerred after the package has been built and pushed to the Octopus Deploy server. Here we have set this to be run once the Build stage has completed successfully.
Promoting a release
You can promote the latest release from one environment to another. Ideally this would be linked to the promotion of a stage e.g. a testing stage, so that the application can be promoted from a test environment to production environment.
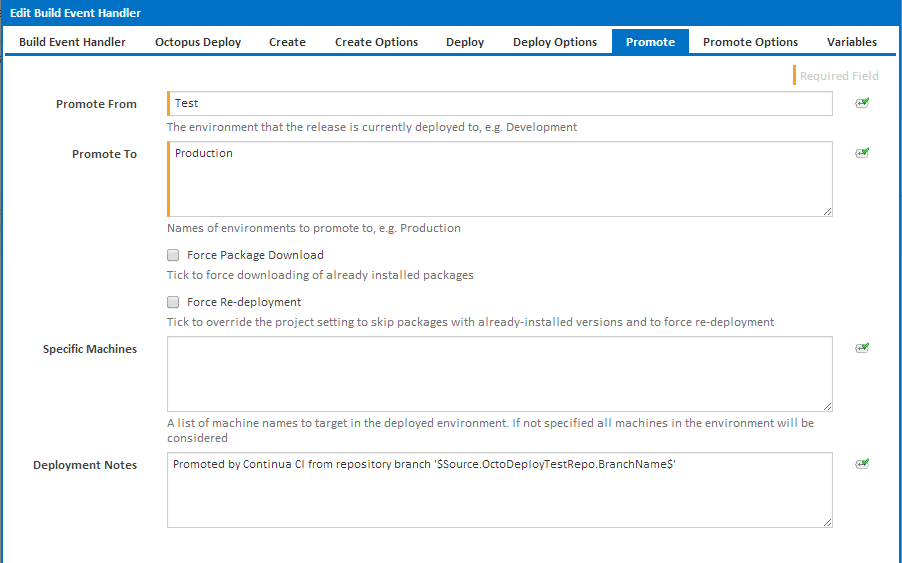
We have set our test stage to require manual promotion;
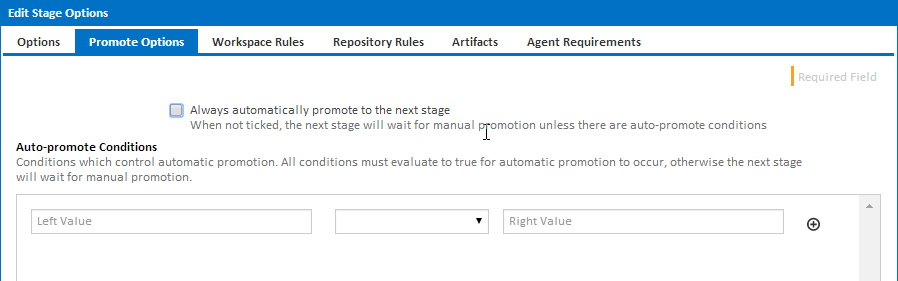
and set our promote action to run when a build is continued after waiting for promotion.
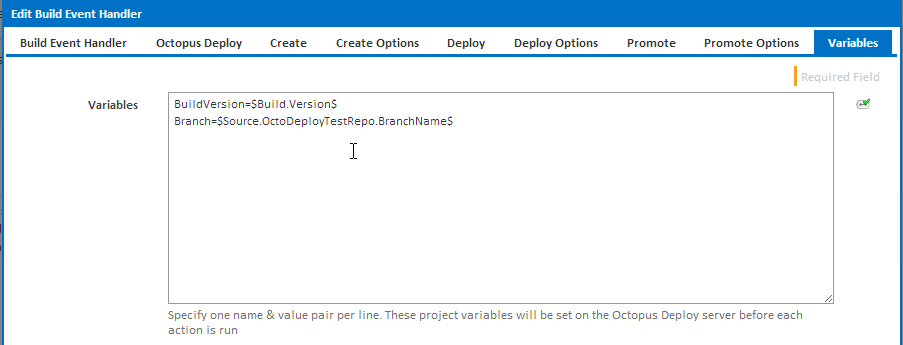
Variables
You can also pass variables from Continua CI to your deployment, these will be sent to the Octopus Deploy server before each action is run, updating the variables for the deployment project. We have used expressions is this example to send the build versions number and branch name. These variables can then be used to update project files with details for display or configure services differently depending on the source of the project.
Running the configuration
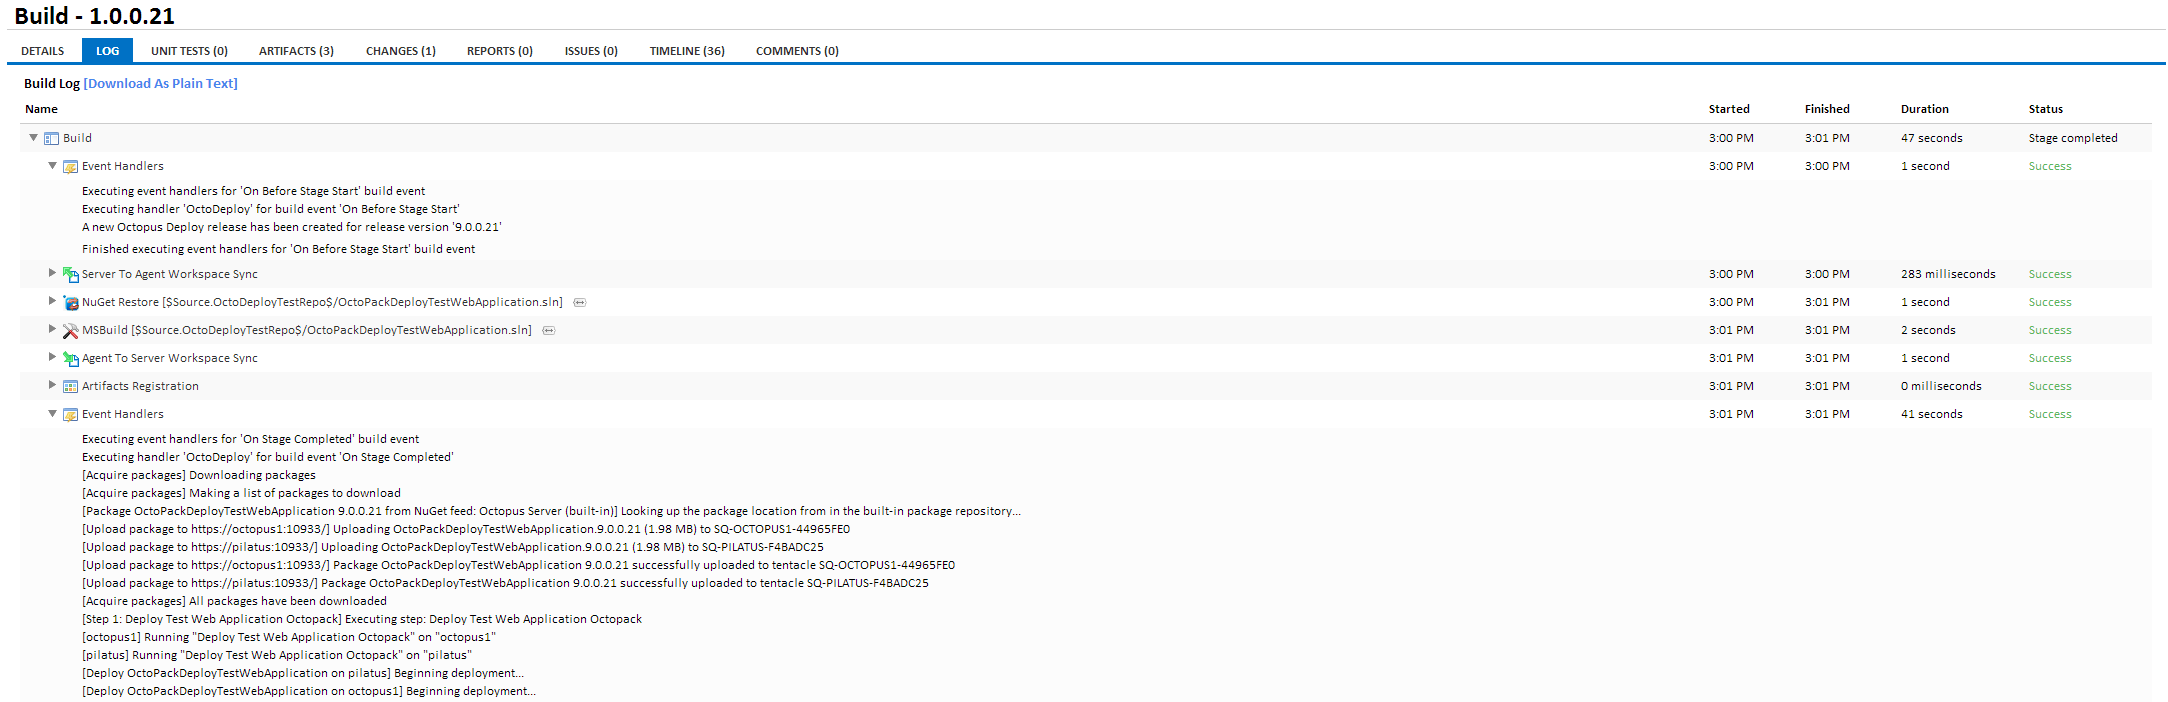
Once your build event handler dialog has been completed and saved, its time to start running the configuration. As the build processes Continua CI will display status information mirroring the process running on Octopus Deploy.

You can also see full details of the deployment process in the build log.
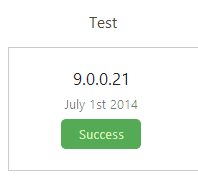
And all going well you will now see a successful deployment on your Octopus Deploy server!